How to fix CPU Fan Error
Paramount Tech Solution
Paramount Tech Solution

How often do we get the problem of CPU fans not working properly, but users ignore it when they get an error message?
However, there could be several causes for the computer fan not working, which may include:
If you are a PC user, you might have a problem with CPU fan failure or you currently have a problem with your PC fan.
There are four primary messages we get when the CPU fan has any trouble, which are:
When a PC turns off automatically, it gives a fan error in the CPU.
Additionally, the CPU fan error on boot occurs when the CPU has hardware issues or BIOS setting mistakes.
Other causes that trigger the error in the fan are overheating, bios CPU fan error, and dust in the CPU.
How to Disable CPU Fan Error Asus?
Step 1: Change the CPU fan direction first.
Step 2: Check if the fan of PC is damaged or not.

Step 3: Inspect if there is any dust in the CPU fan dust filter.
Step 4: Look at the CPU heatsink system working properly.
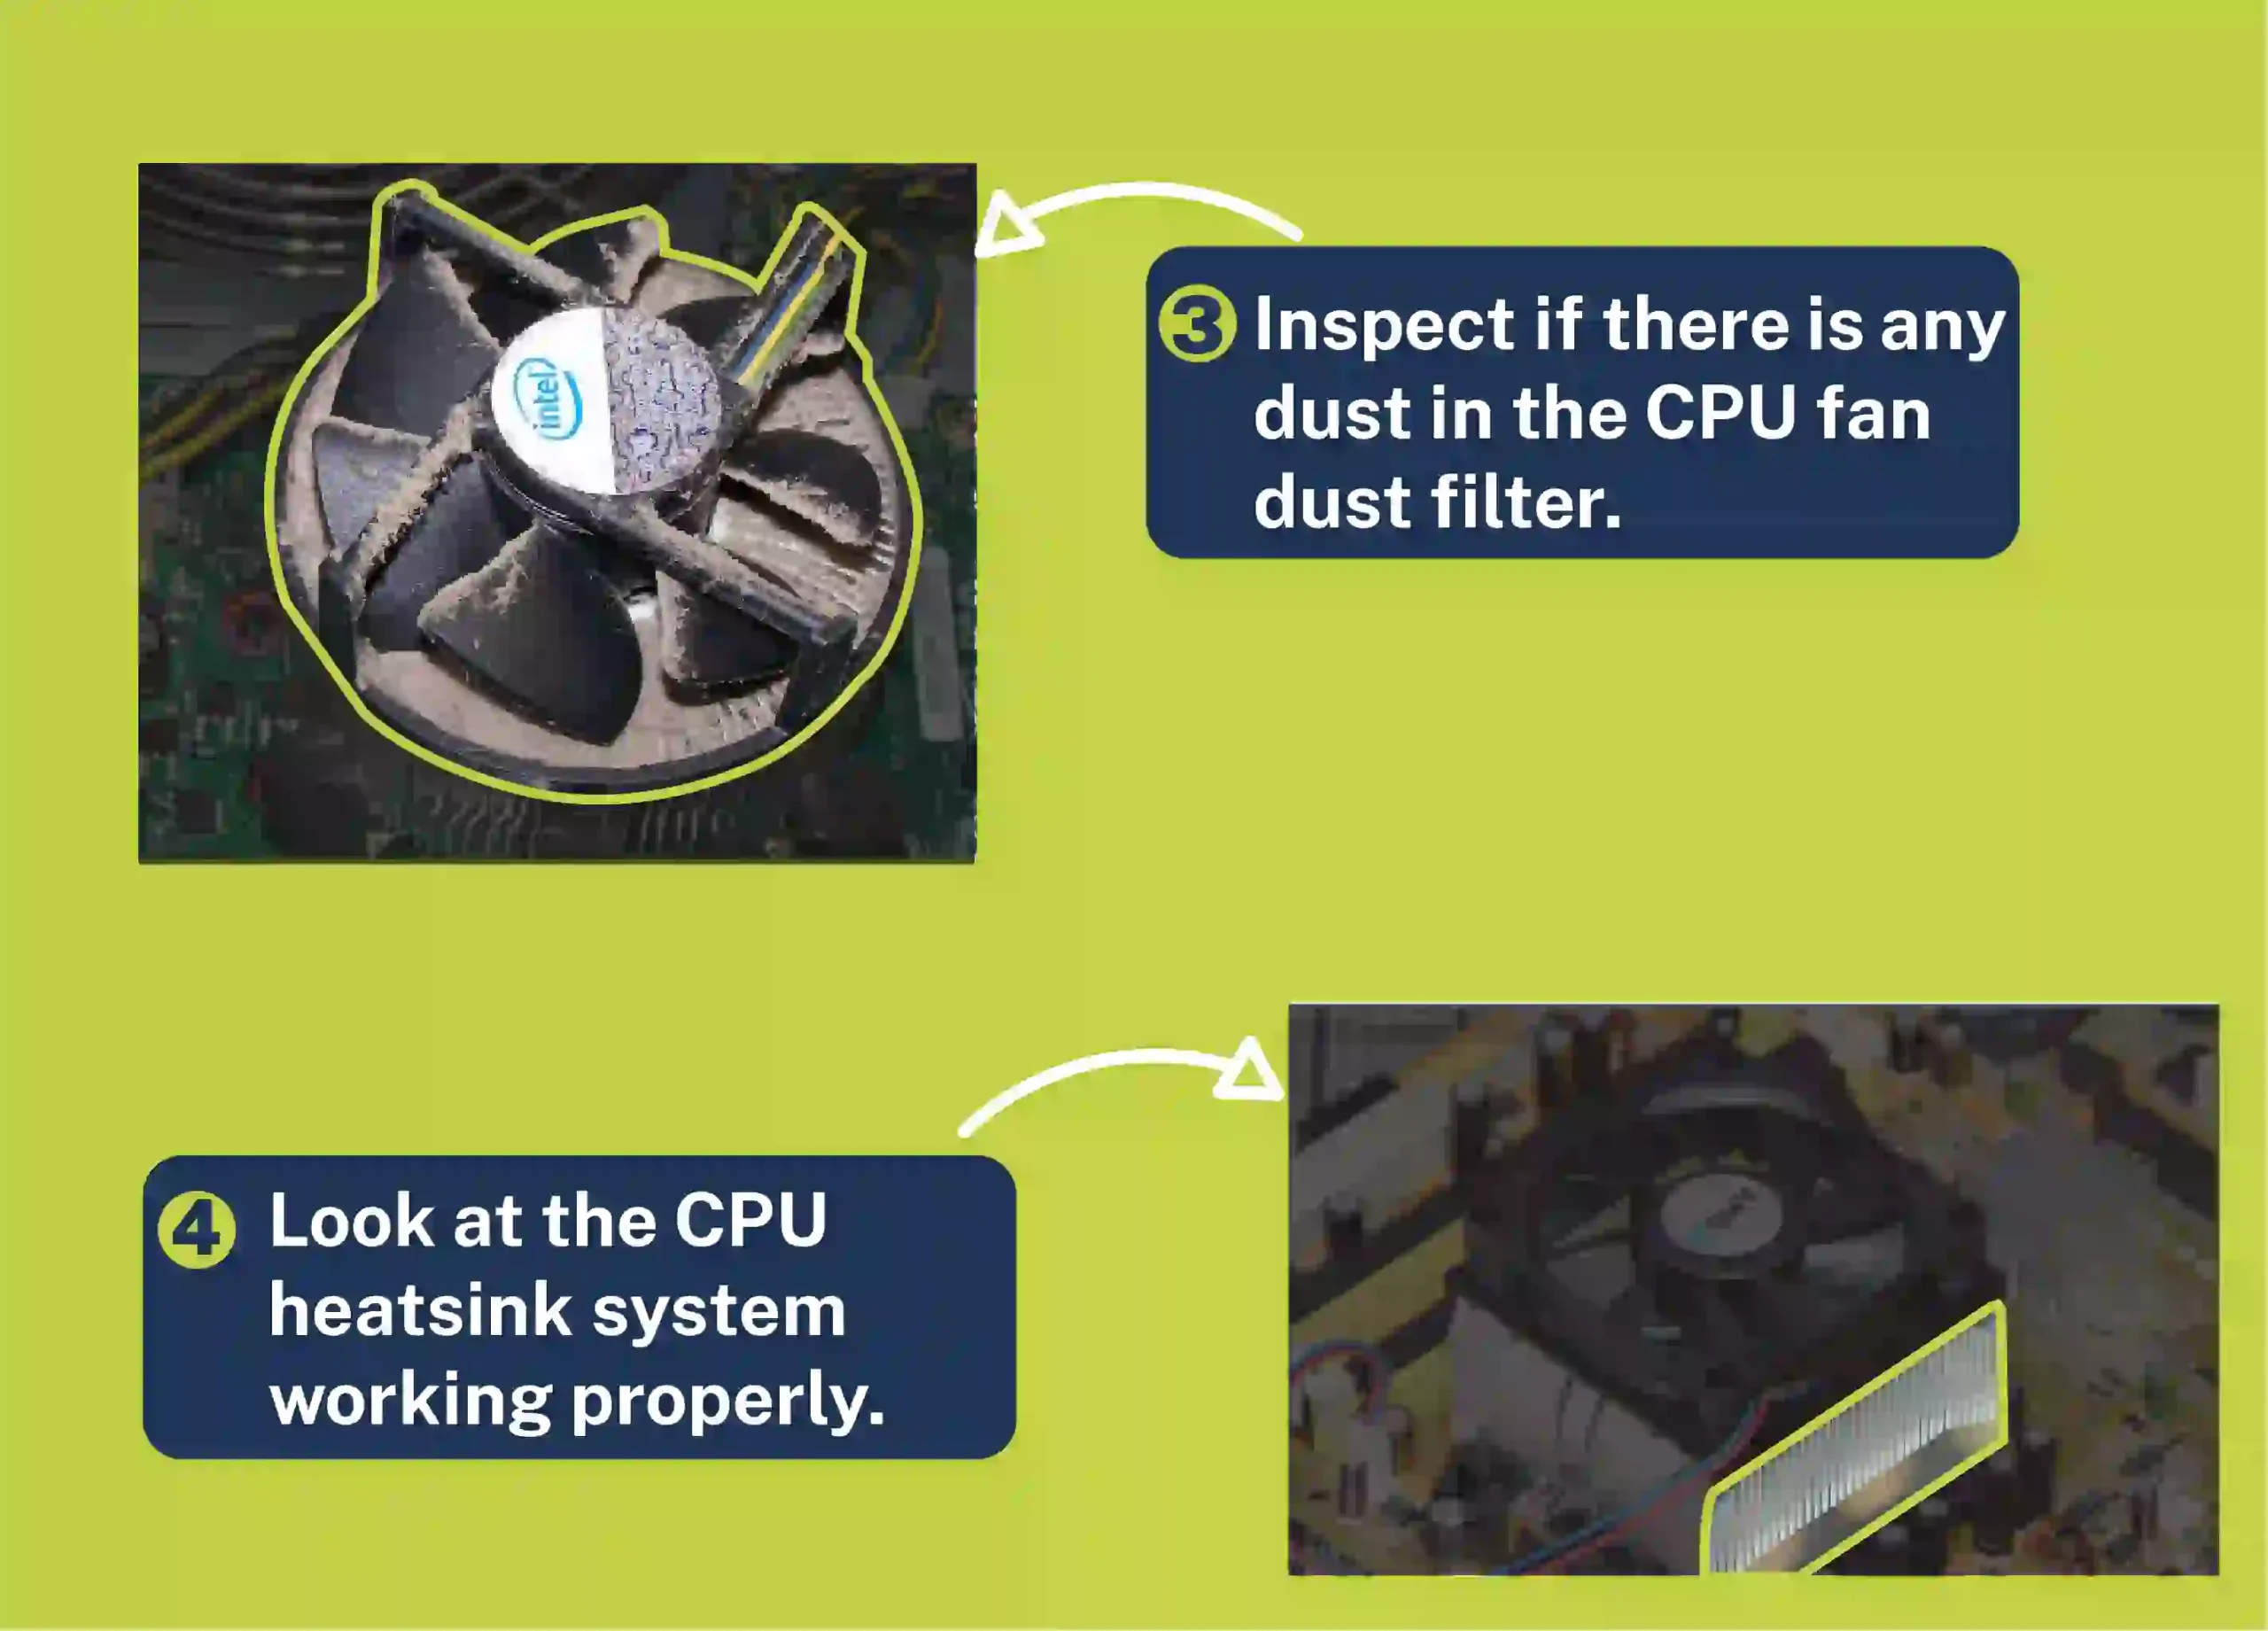
GO through these steps, This will fix fan errors in your PC.
If not, you must replace your fans with the best CPU cooler.
Most CPU fan speed error detected due to variations in the fan speed from high speed to low speed. These speed changes increase the pressure on the CPU cooler, leading to speed error detection.
The speed changes could also indicate that your PC is generating more heat.
Resolve the CPU fan speed detection error using hardware:
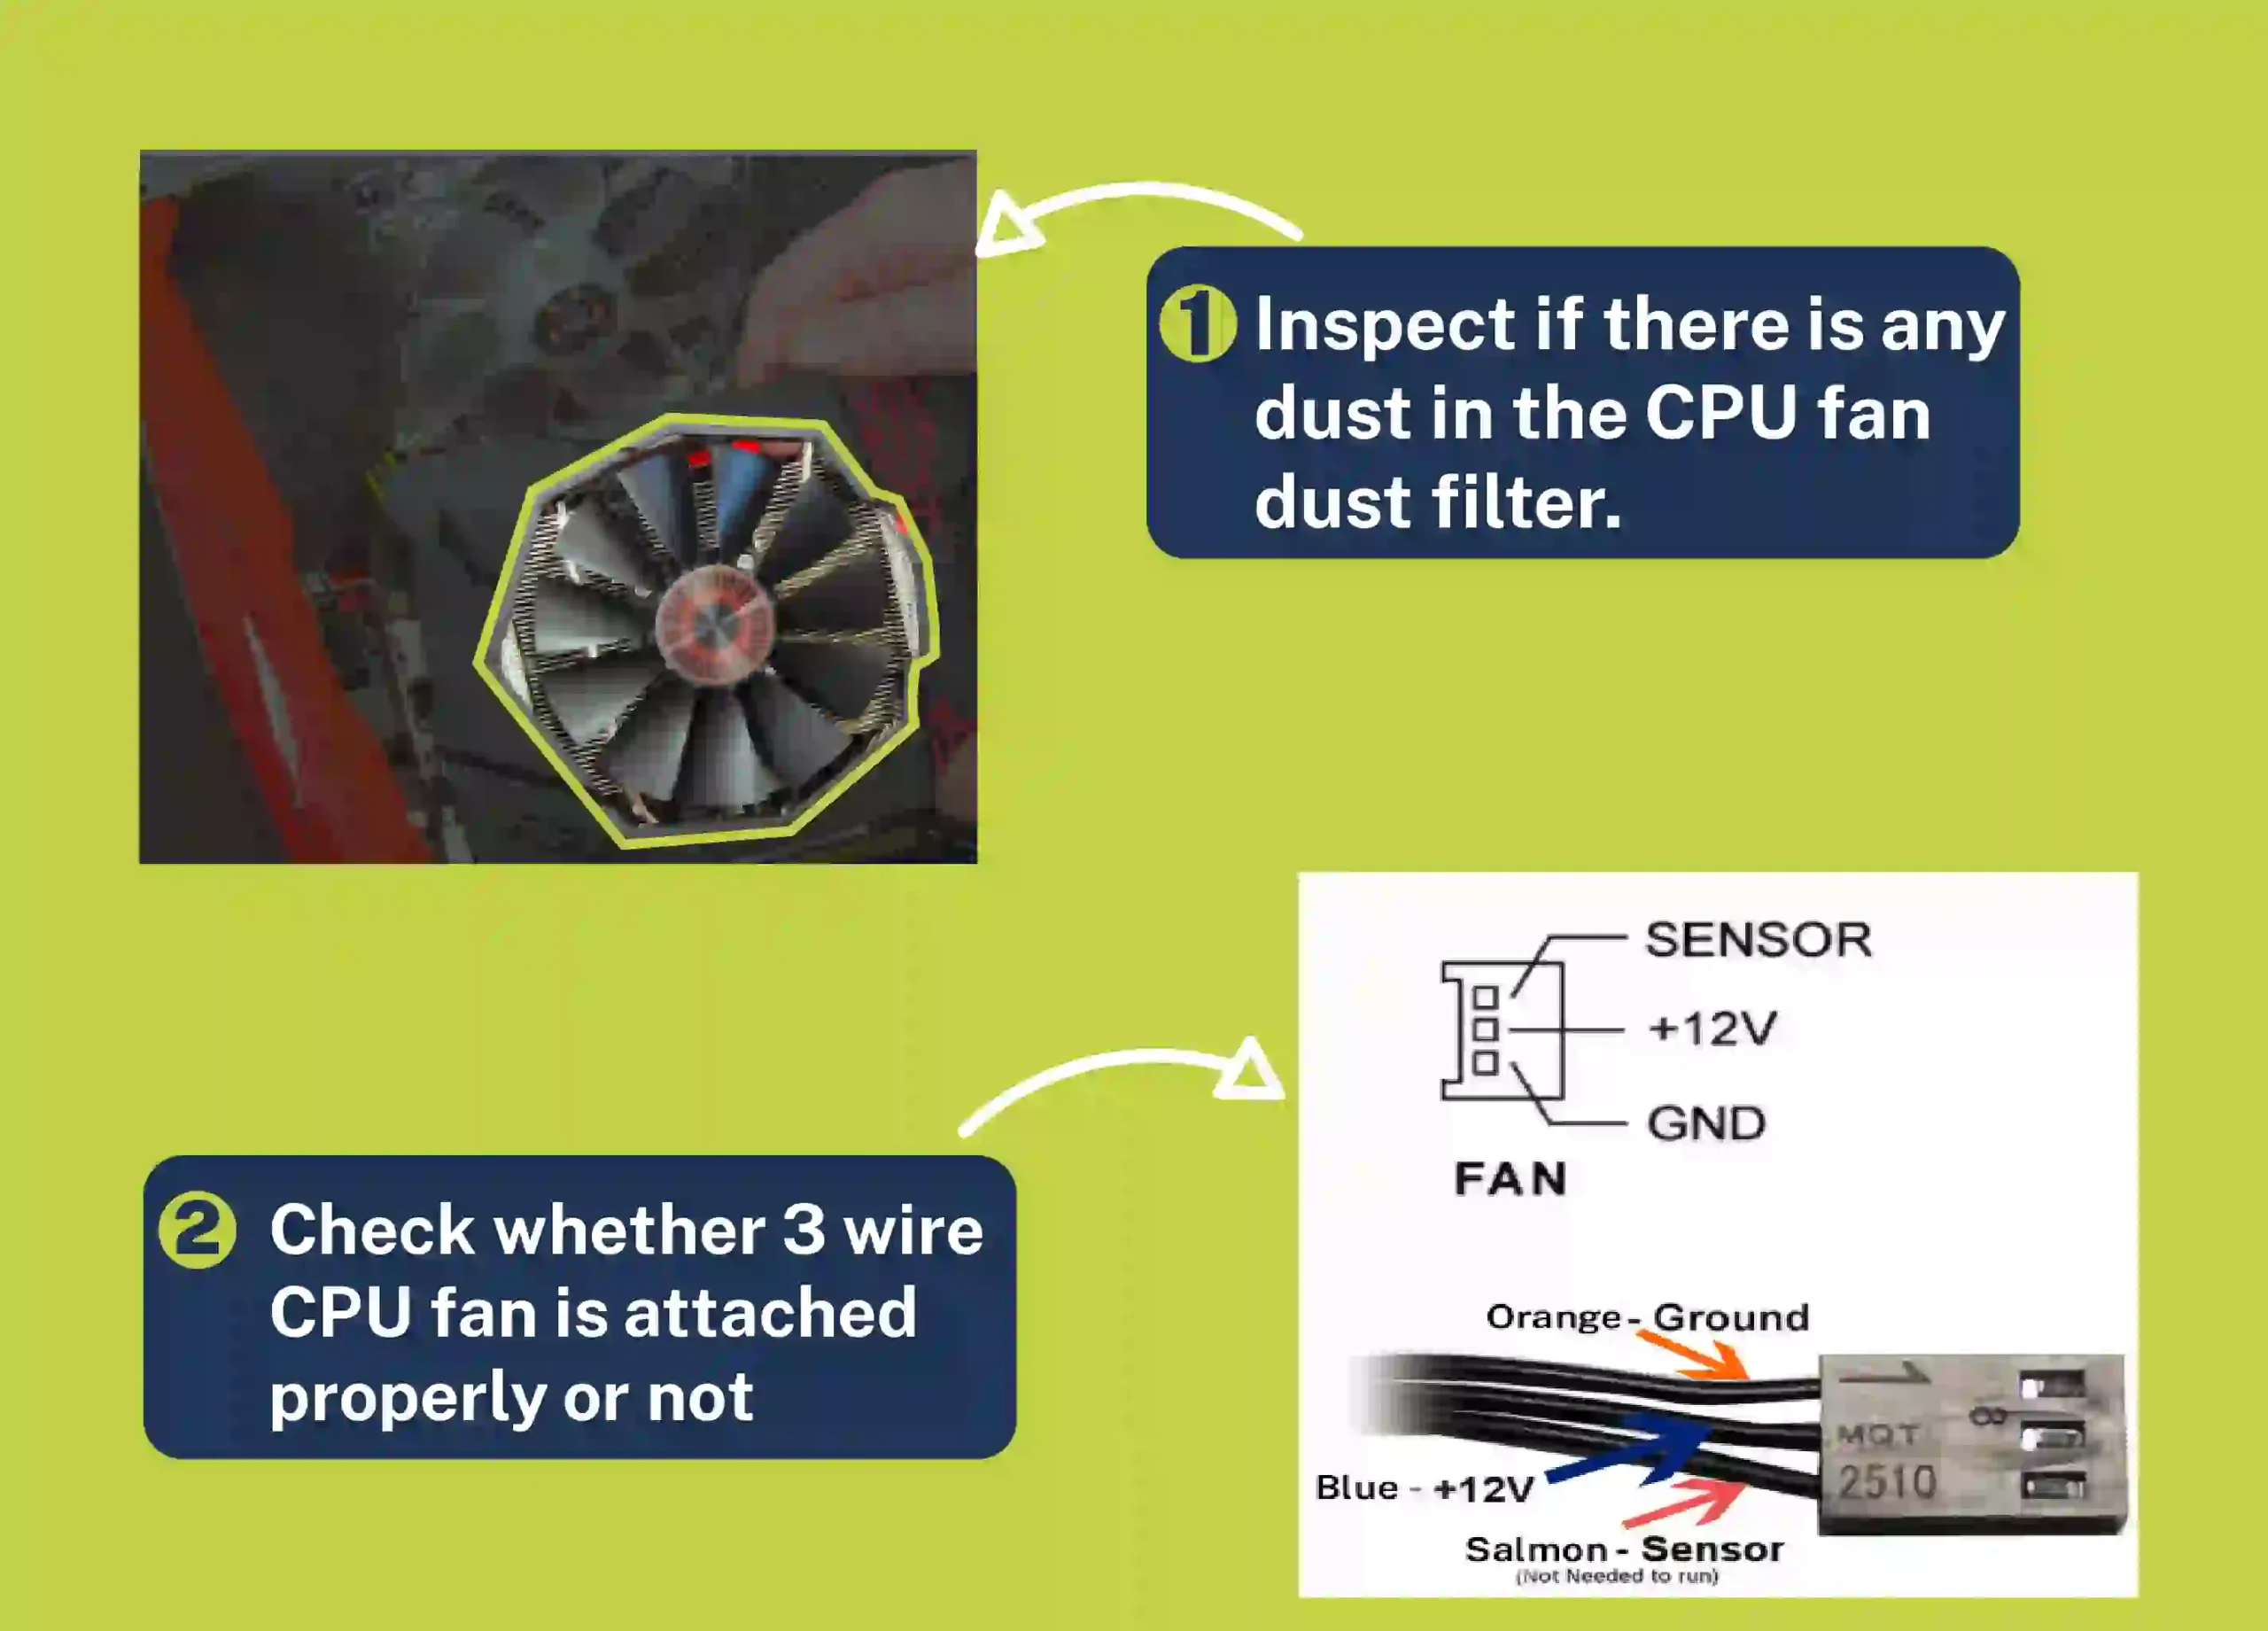
1.Examine the hardware if there is any scratch to the fan or not
2.Check whether 3 wire CPU fan is attached properly or not
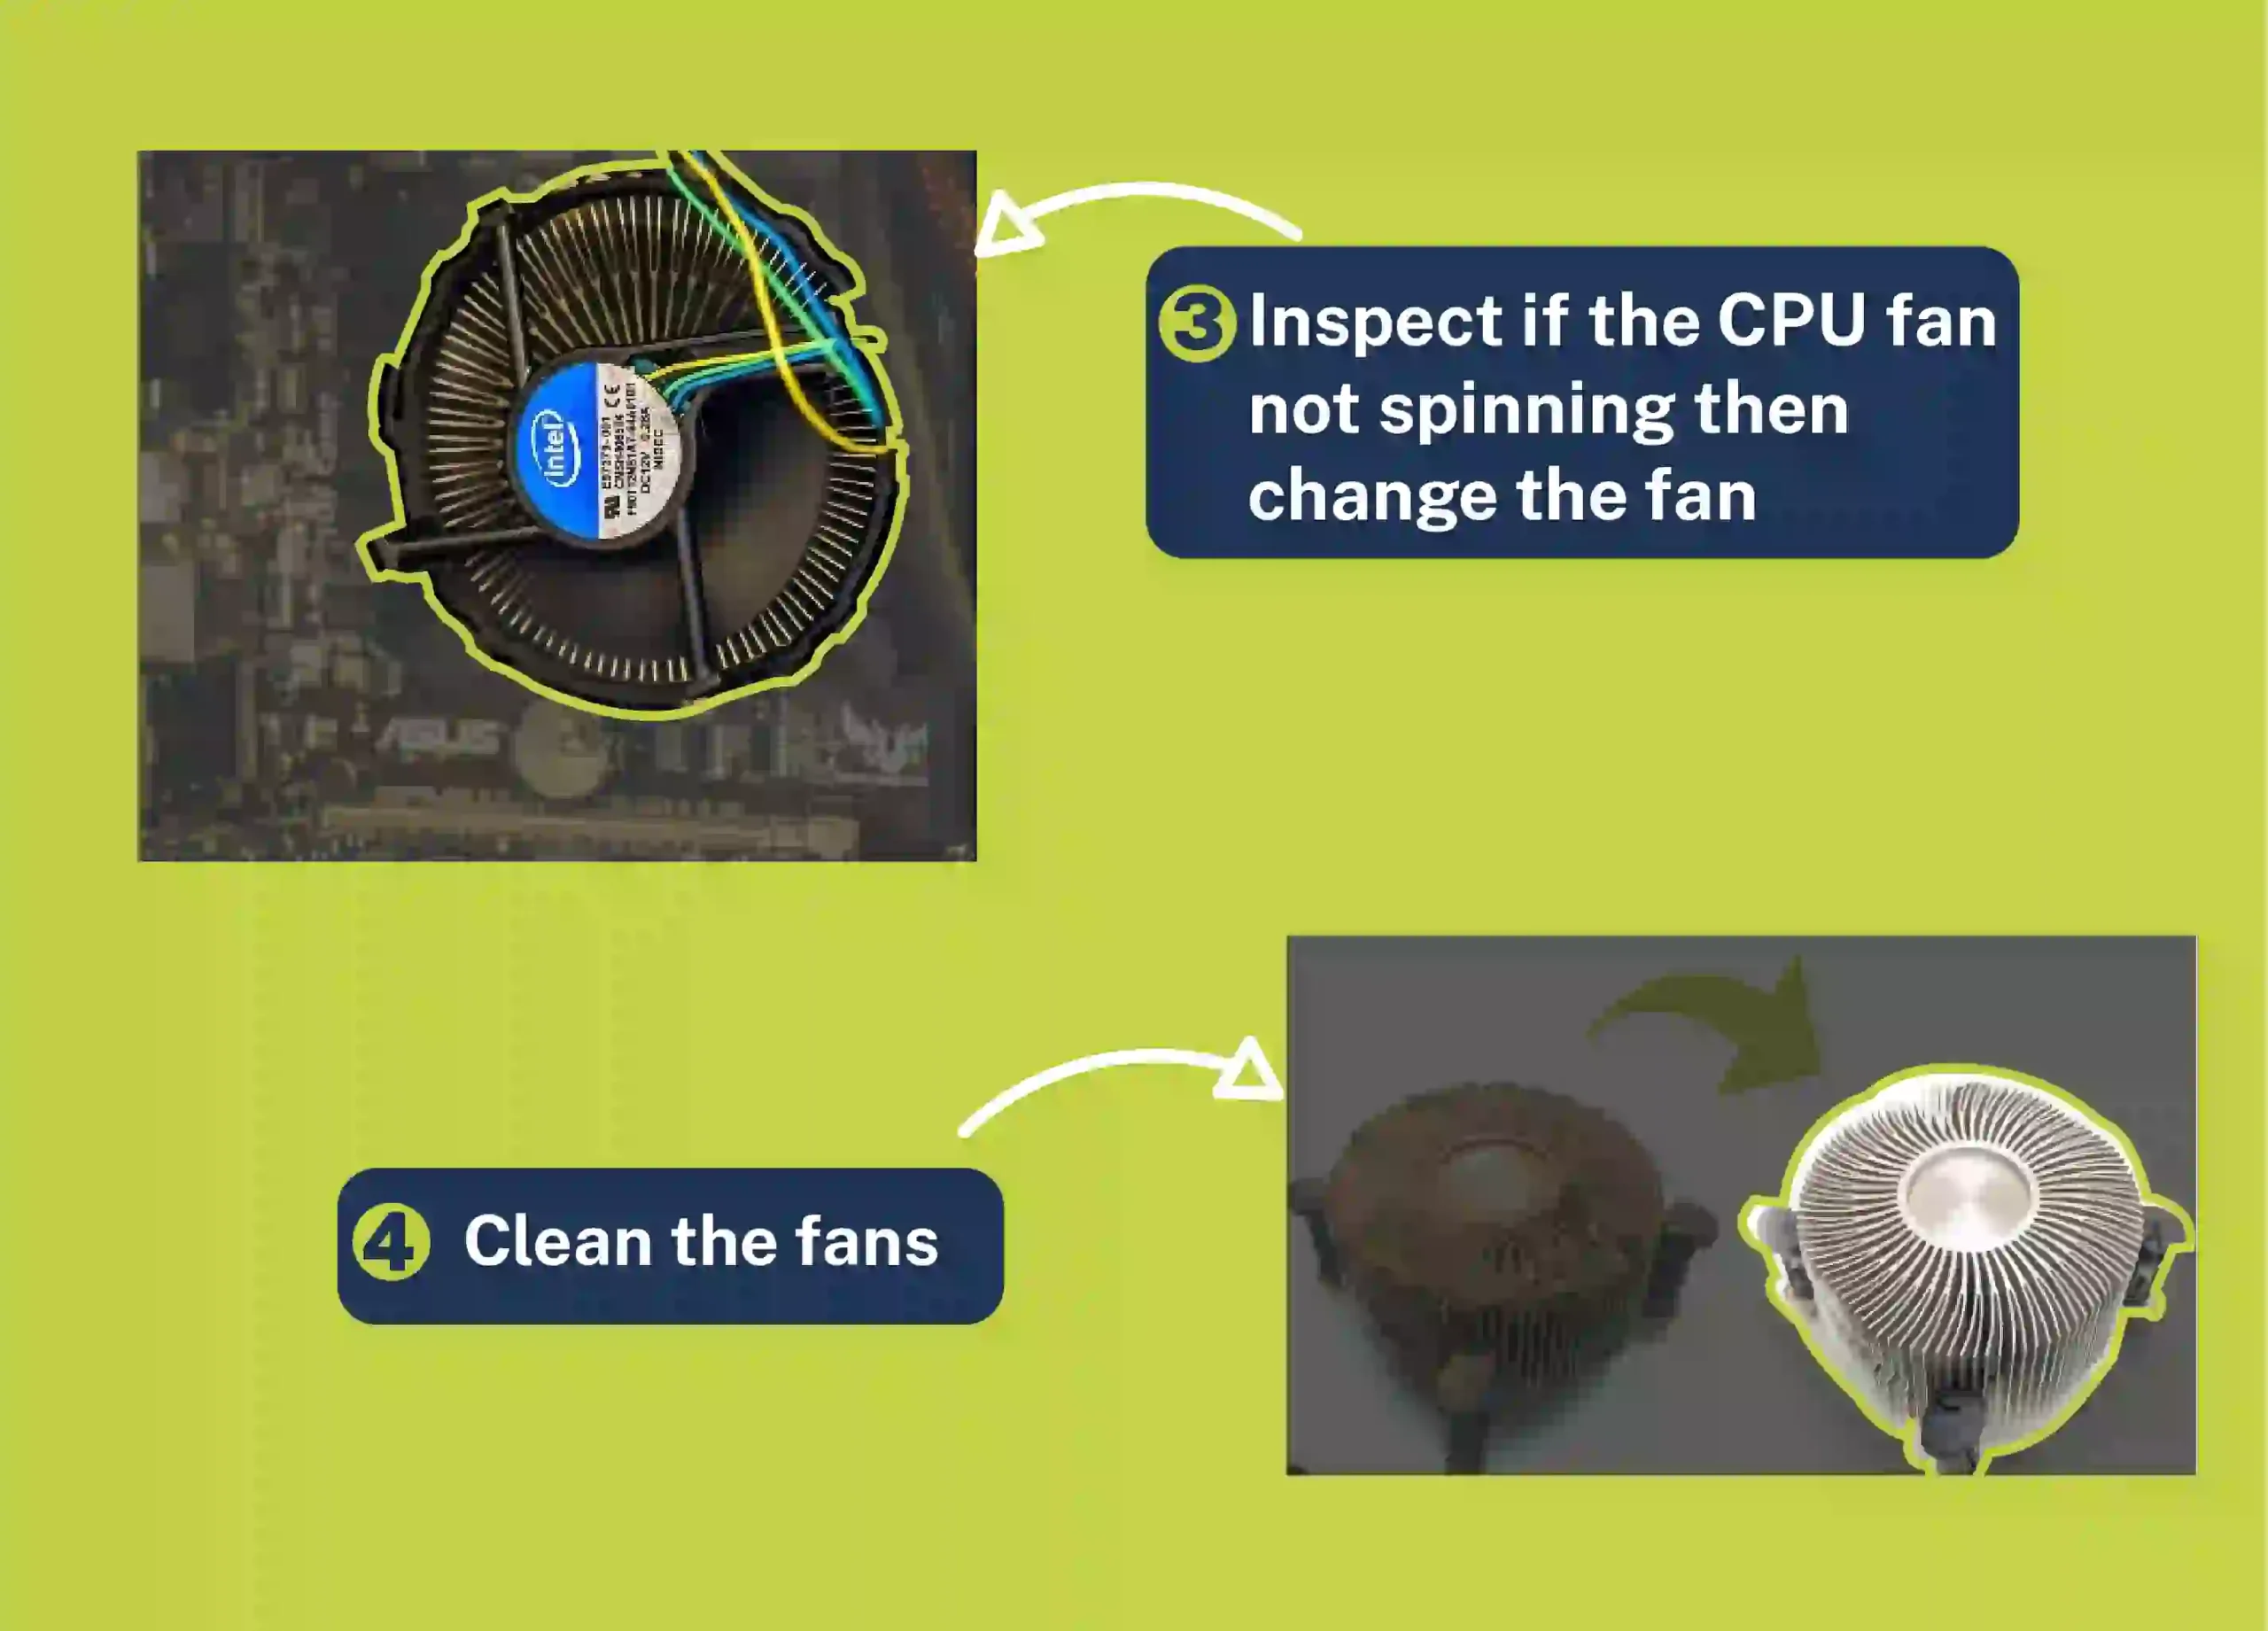
3.Inspect if the CPU fan not spinning, then change the fan
4.Clean the fans
If you have checked all possible errors in fan hardware and all things are ok there, then you should check the Bios settings of your system.
Follow the steps to ignore the Bios settings error:
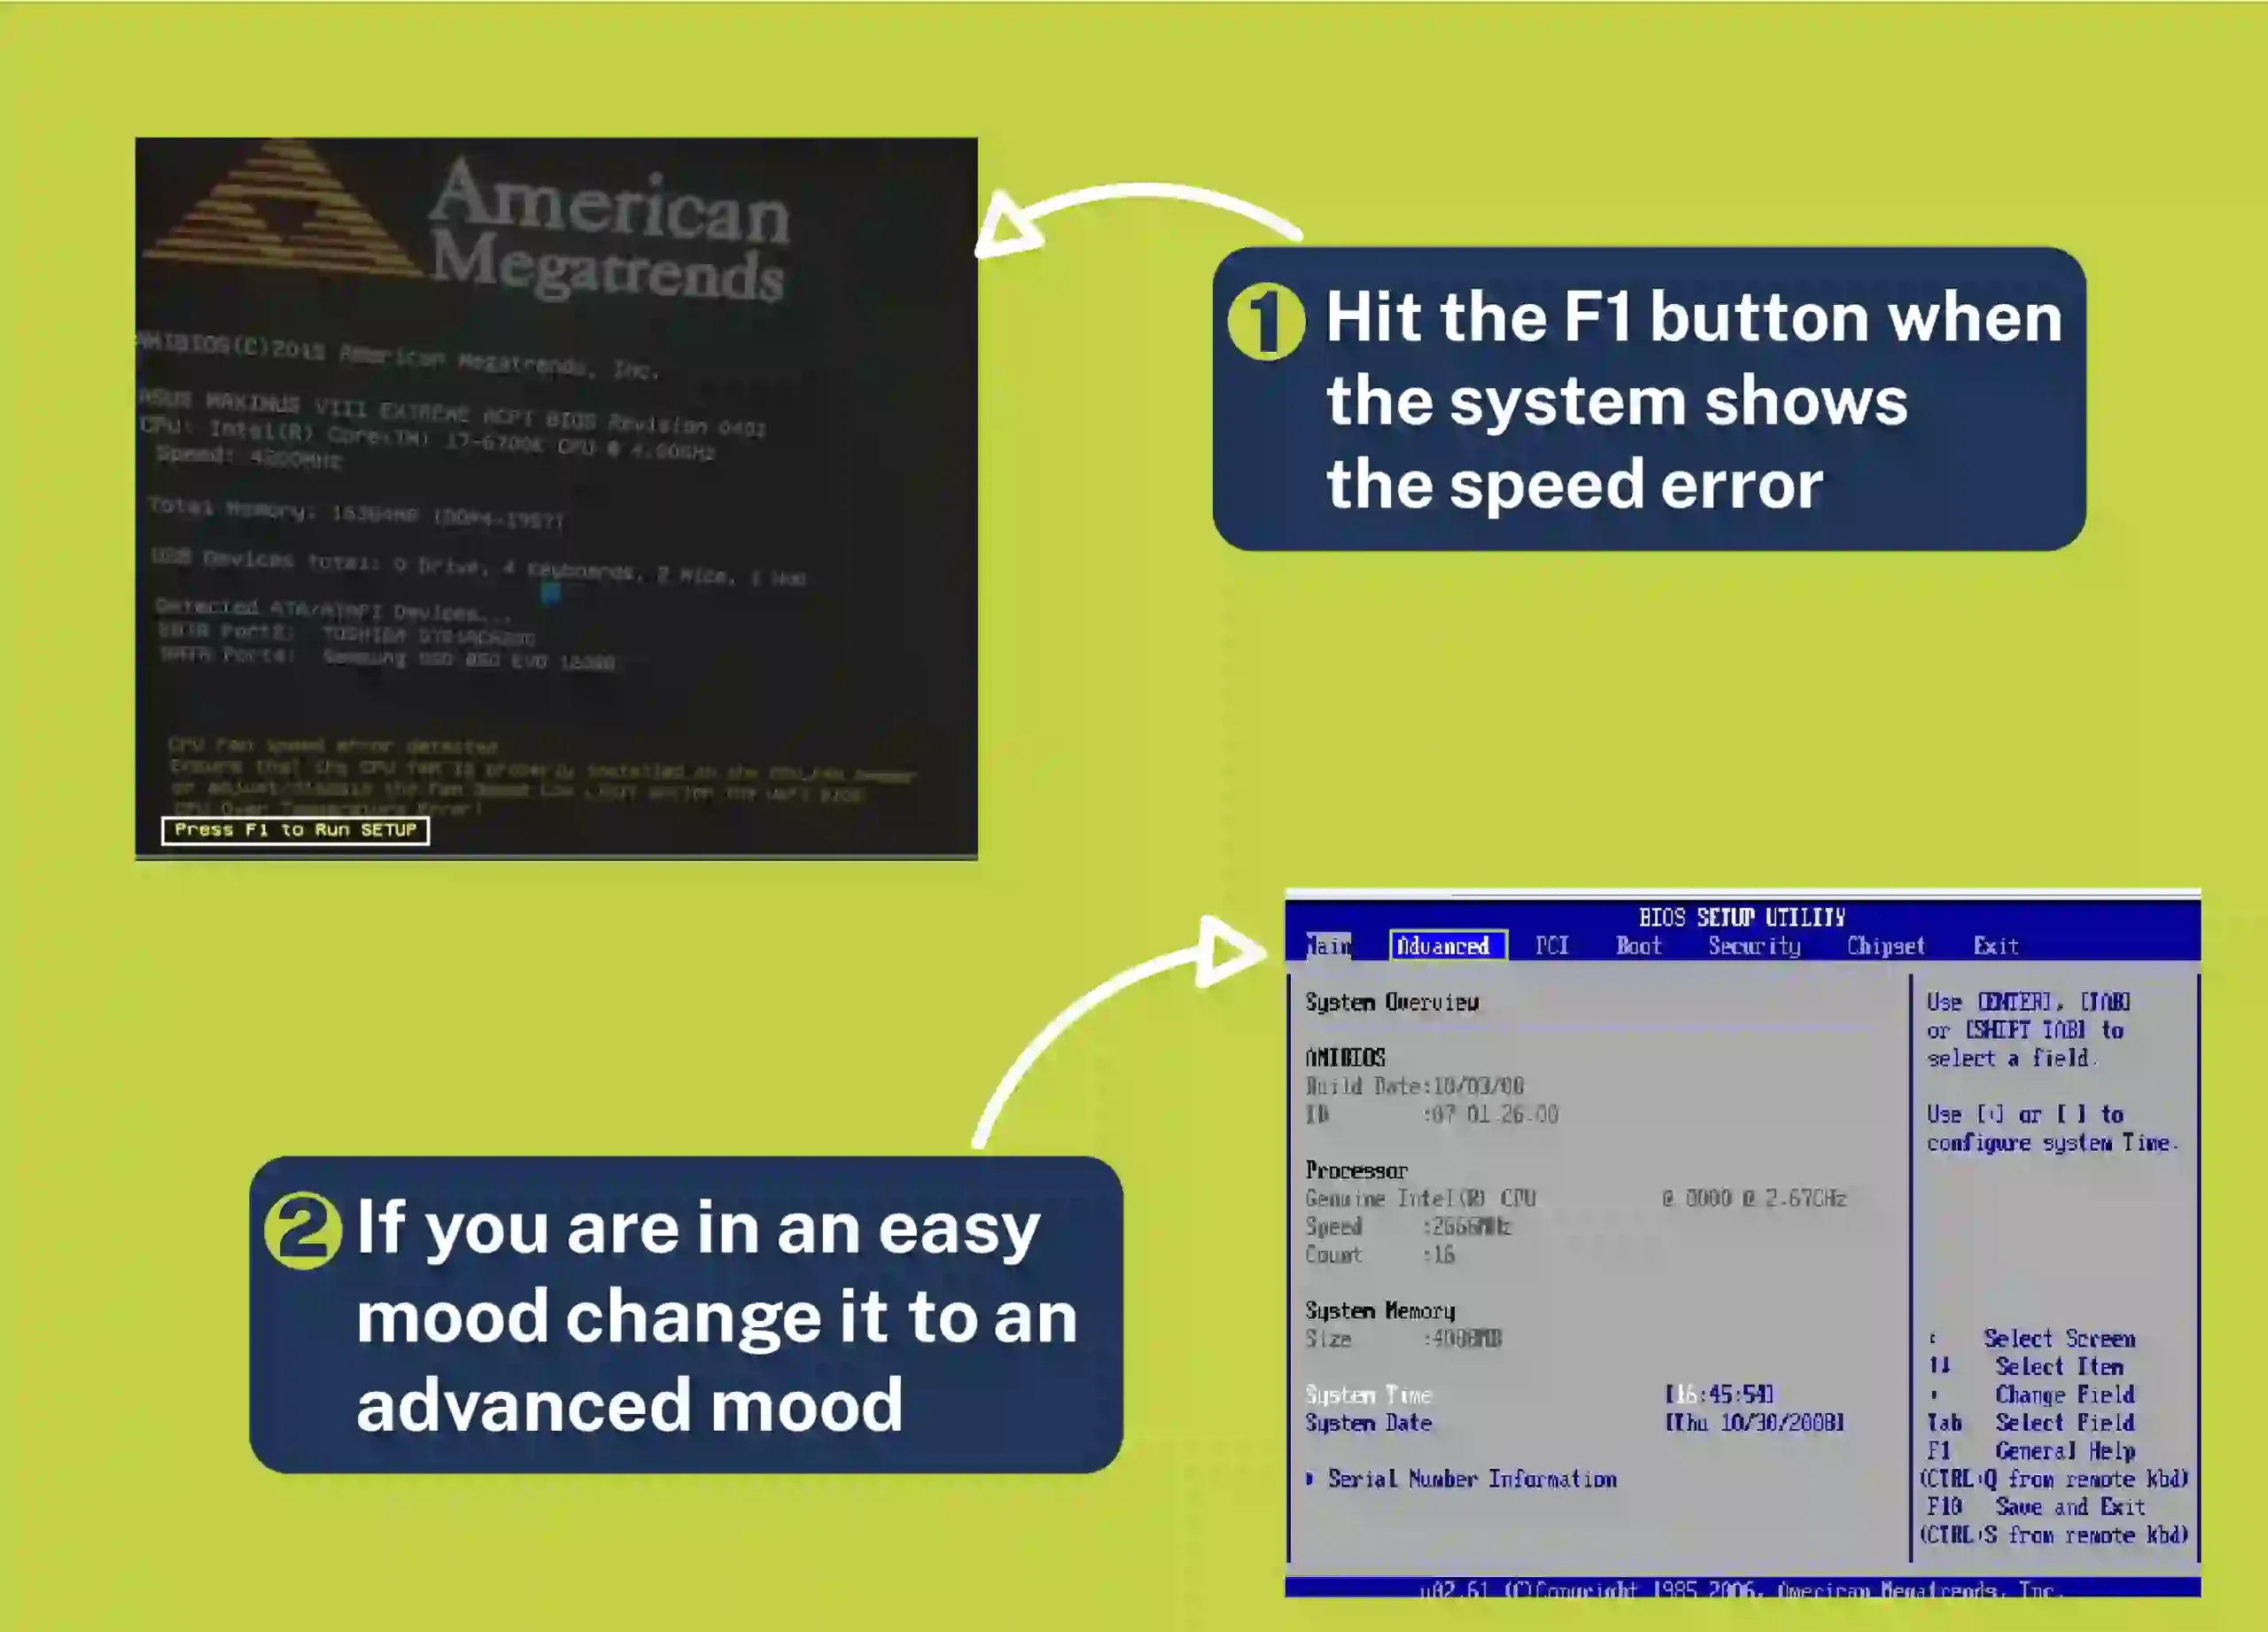
1.Hit the F1 button when the system shows the speed error
2.If you are in an easy mood change it to an advanced mood
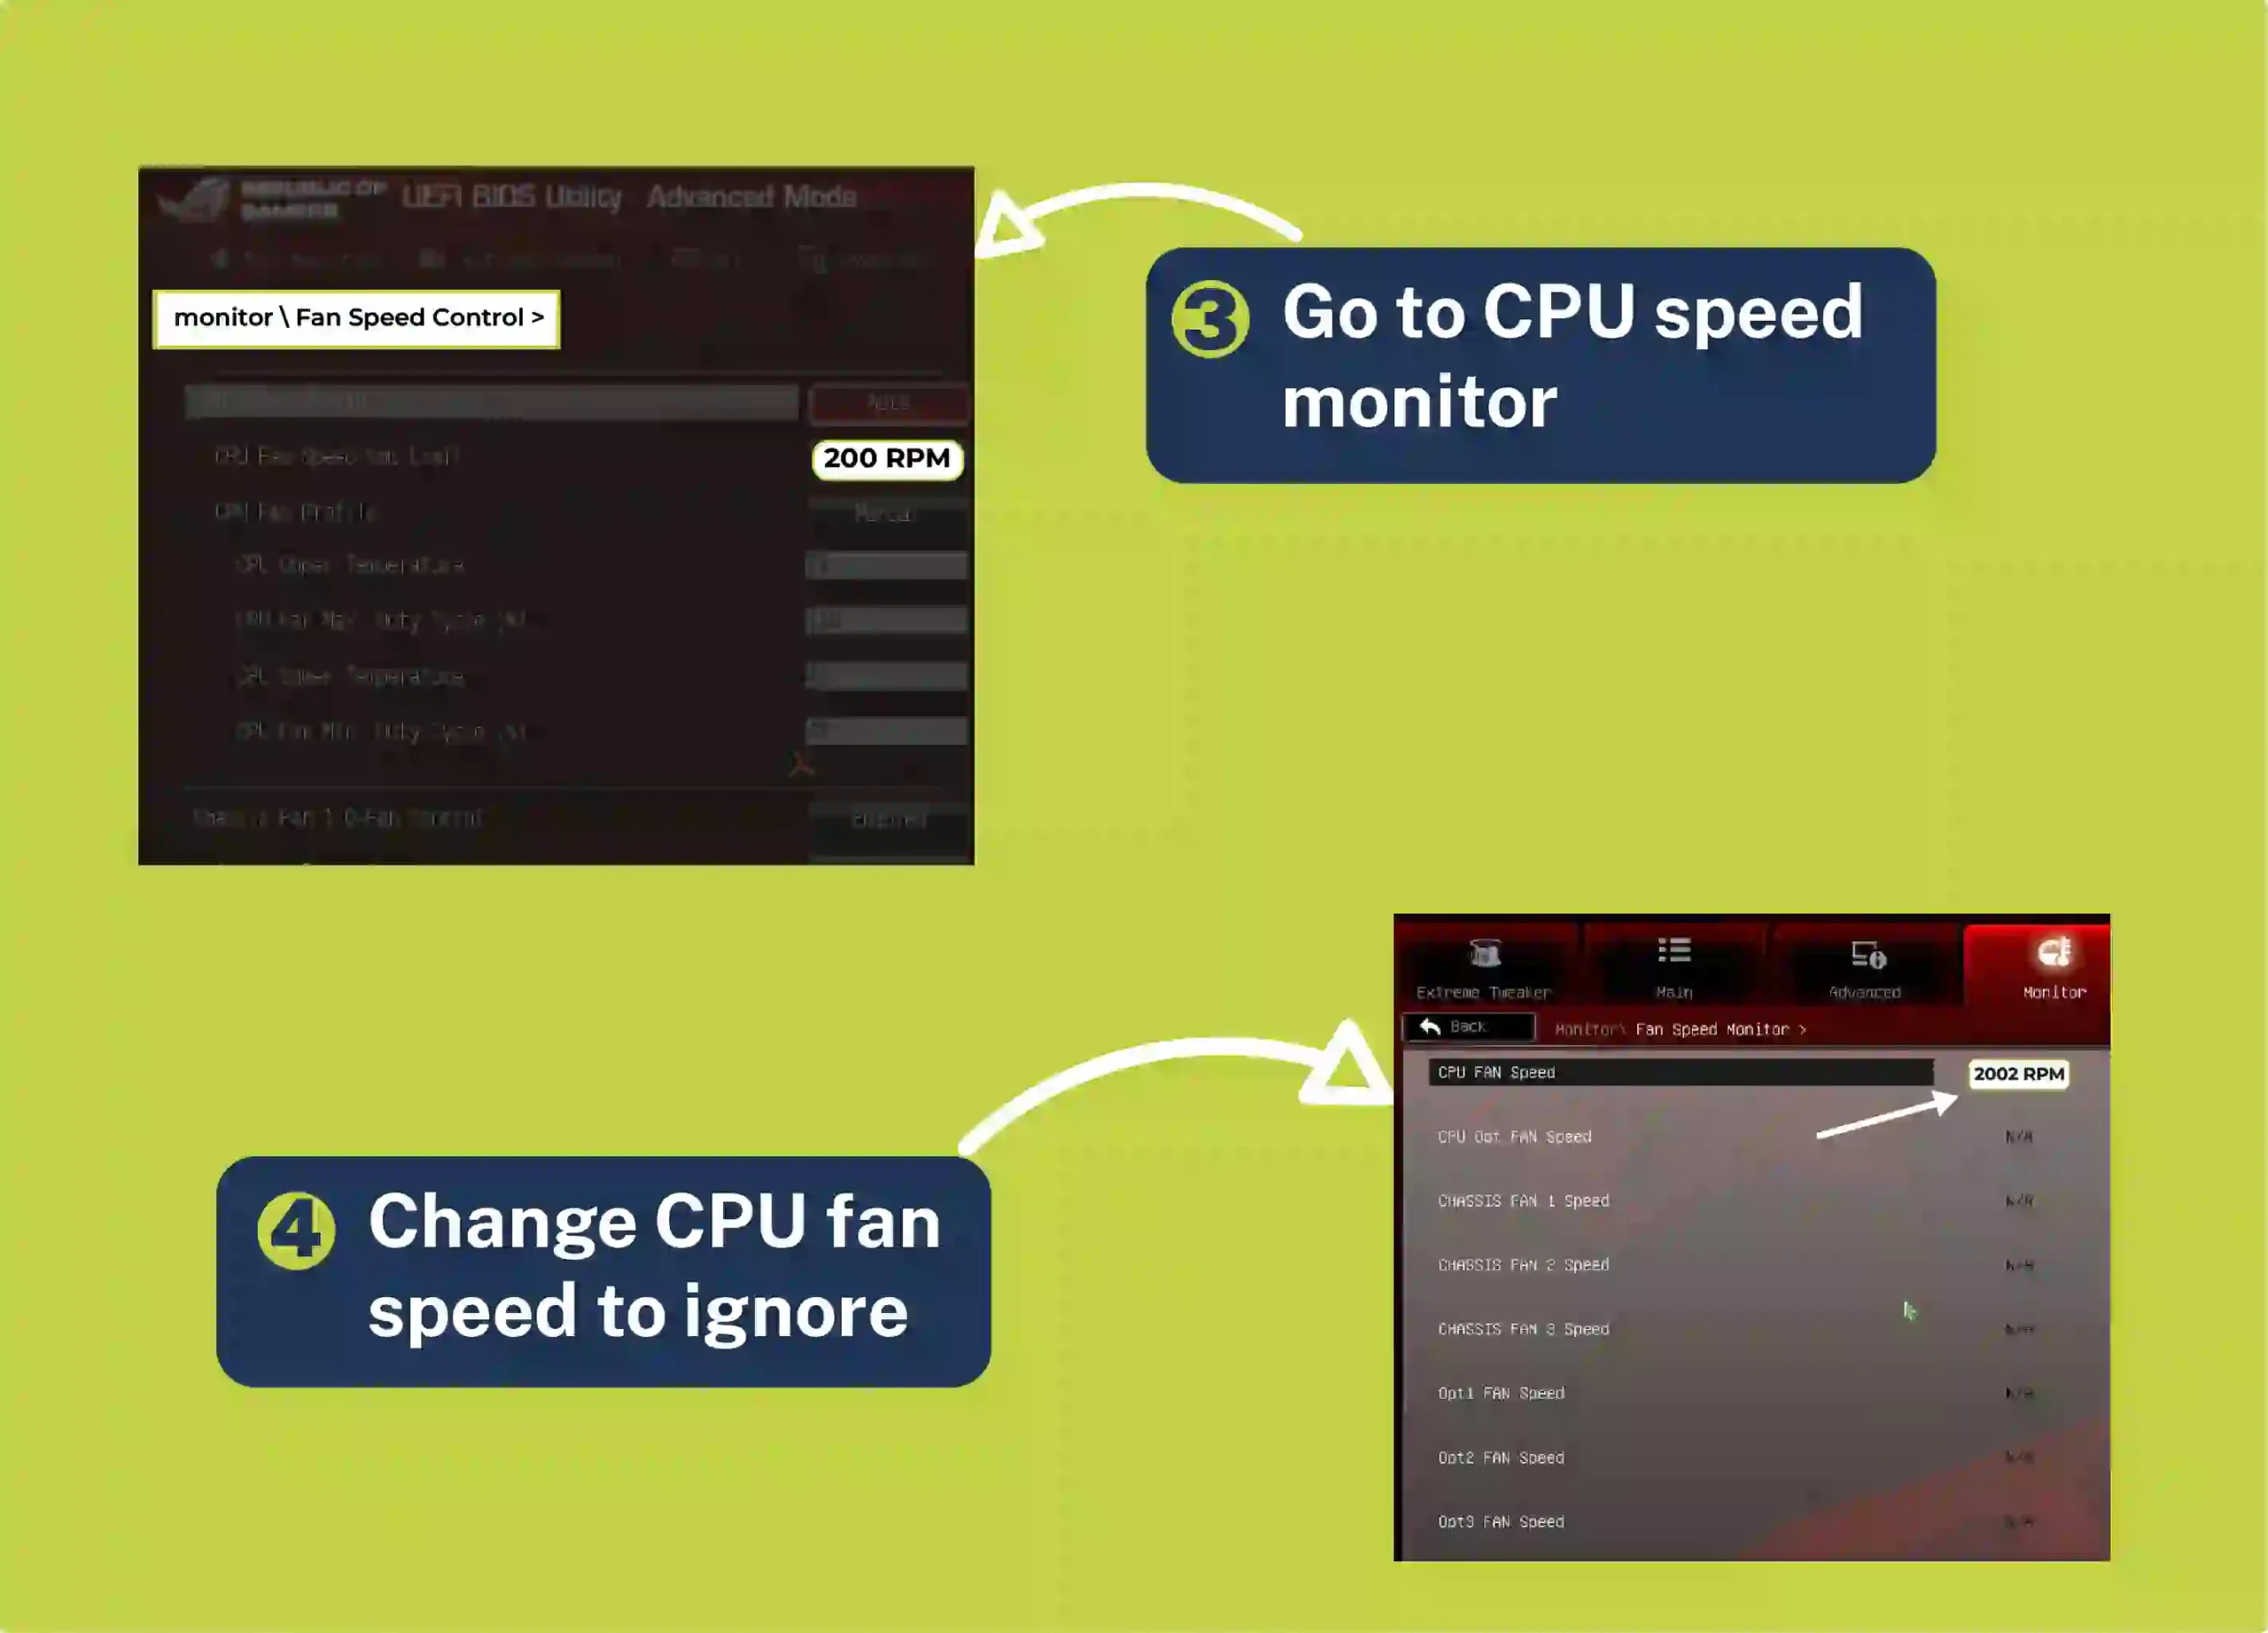
3.Go to CPU speed monitor
4.Change CPU fan speed to ignore
Hopefully, it will not show the fan speed error message
The speed of your PC fan plays an important role in the performance of your PC because speed changes slow down the system.
For that, Most PC users ask How to change CPU fan speed. Which leads them to try different methods to change the speed.
But mainly try the wrong methods, which cause further damage to the fans. However, we will guide you through the authentic method to change the fan’s speed. Implement the given method as explained for a better solution.
It is essential to control CPU fan speed so that you can optimize fans to improve the performance of your PC.
Methods for the CPU fan controller
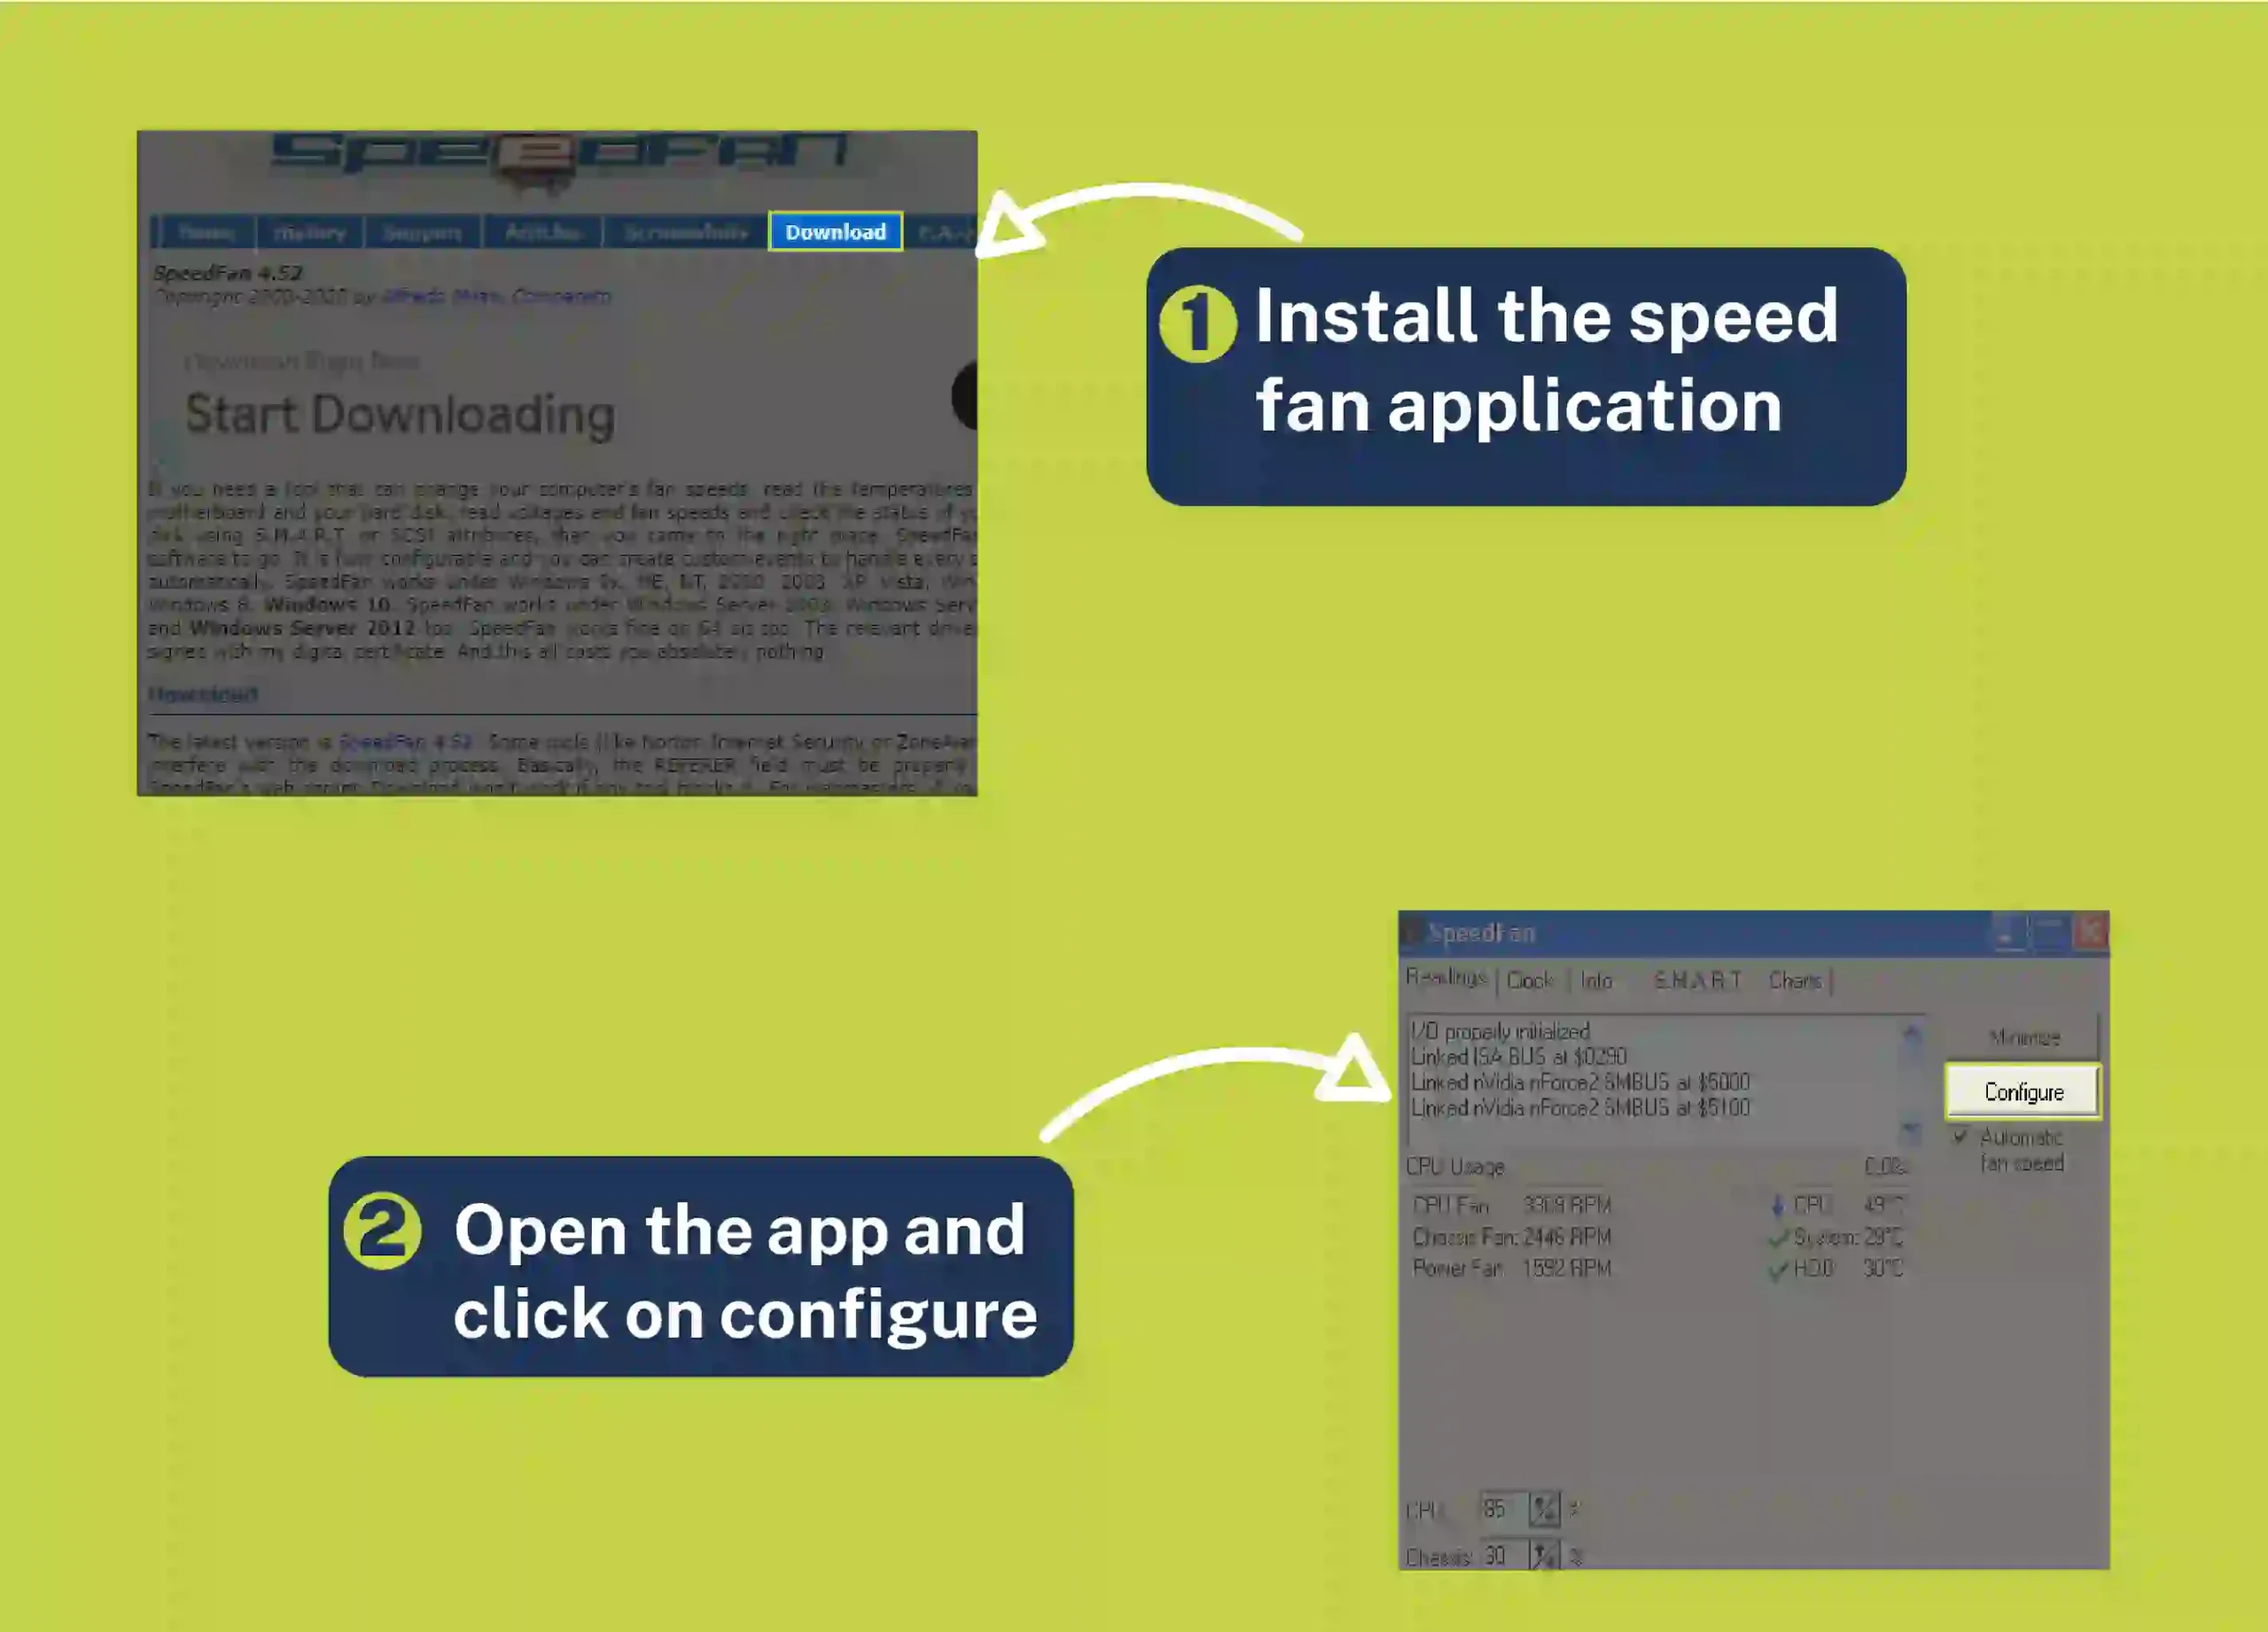
3.Install the speed fan application
4.Open the app and click on configure
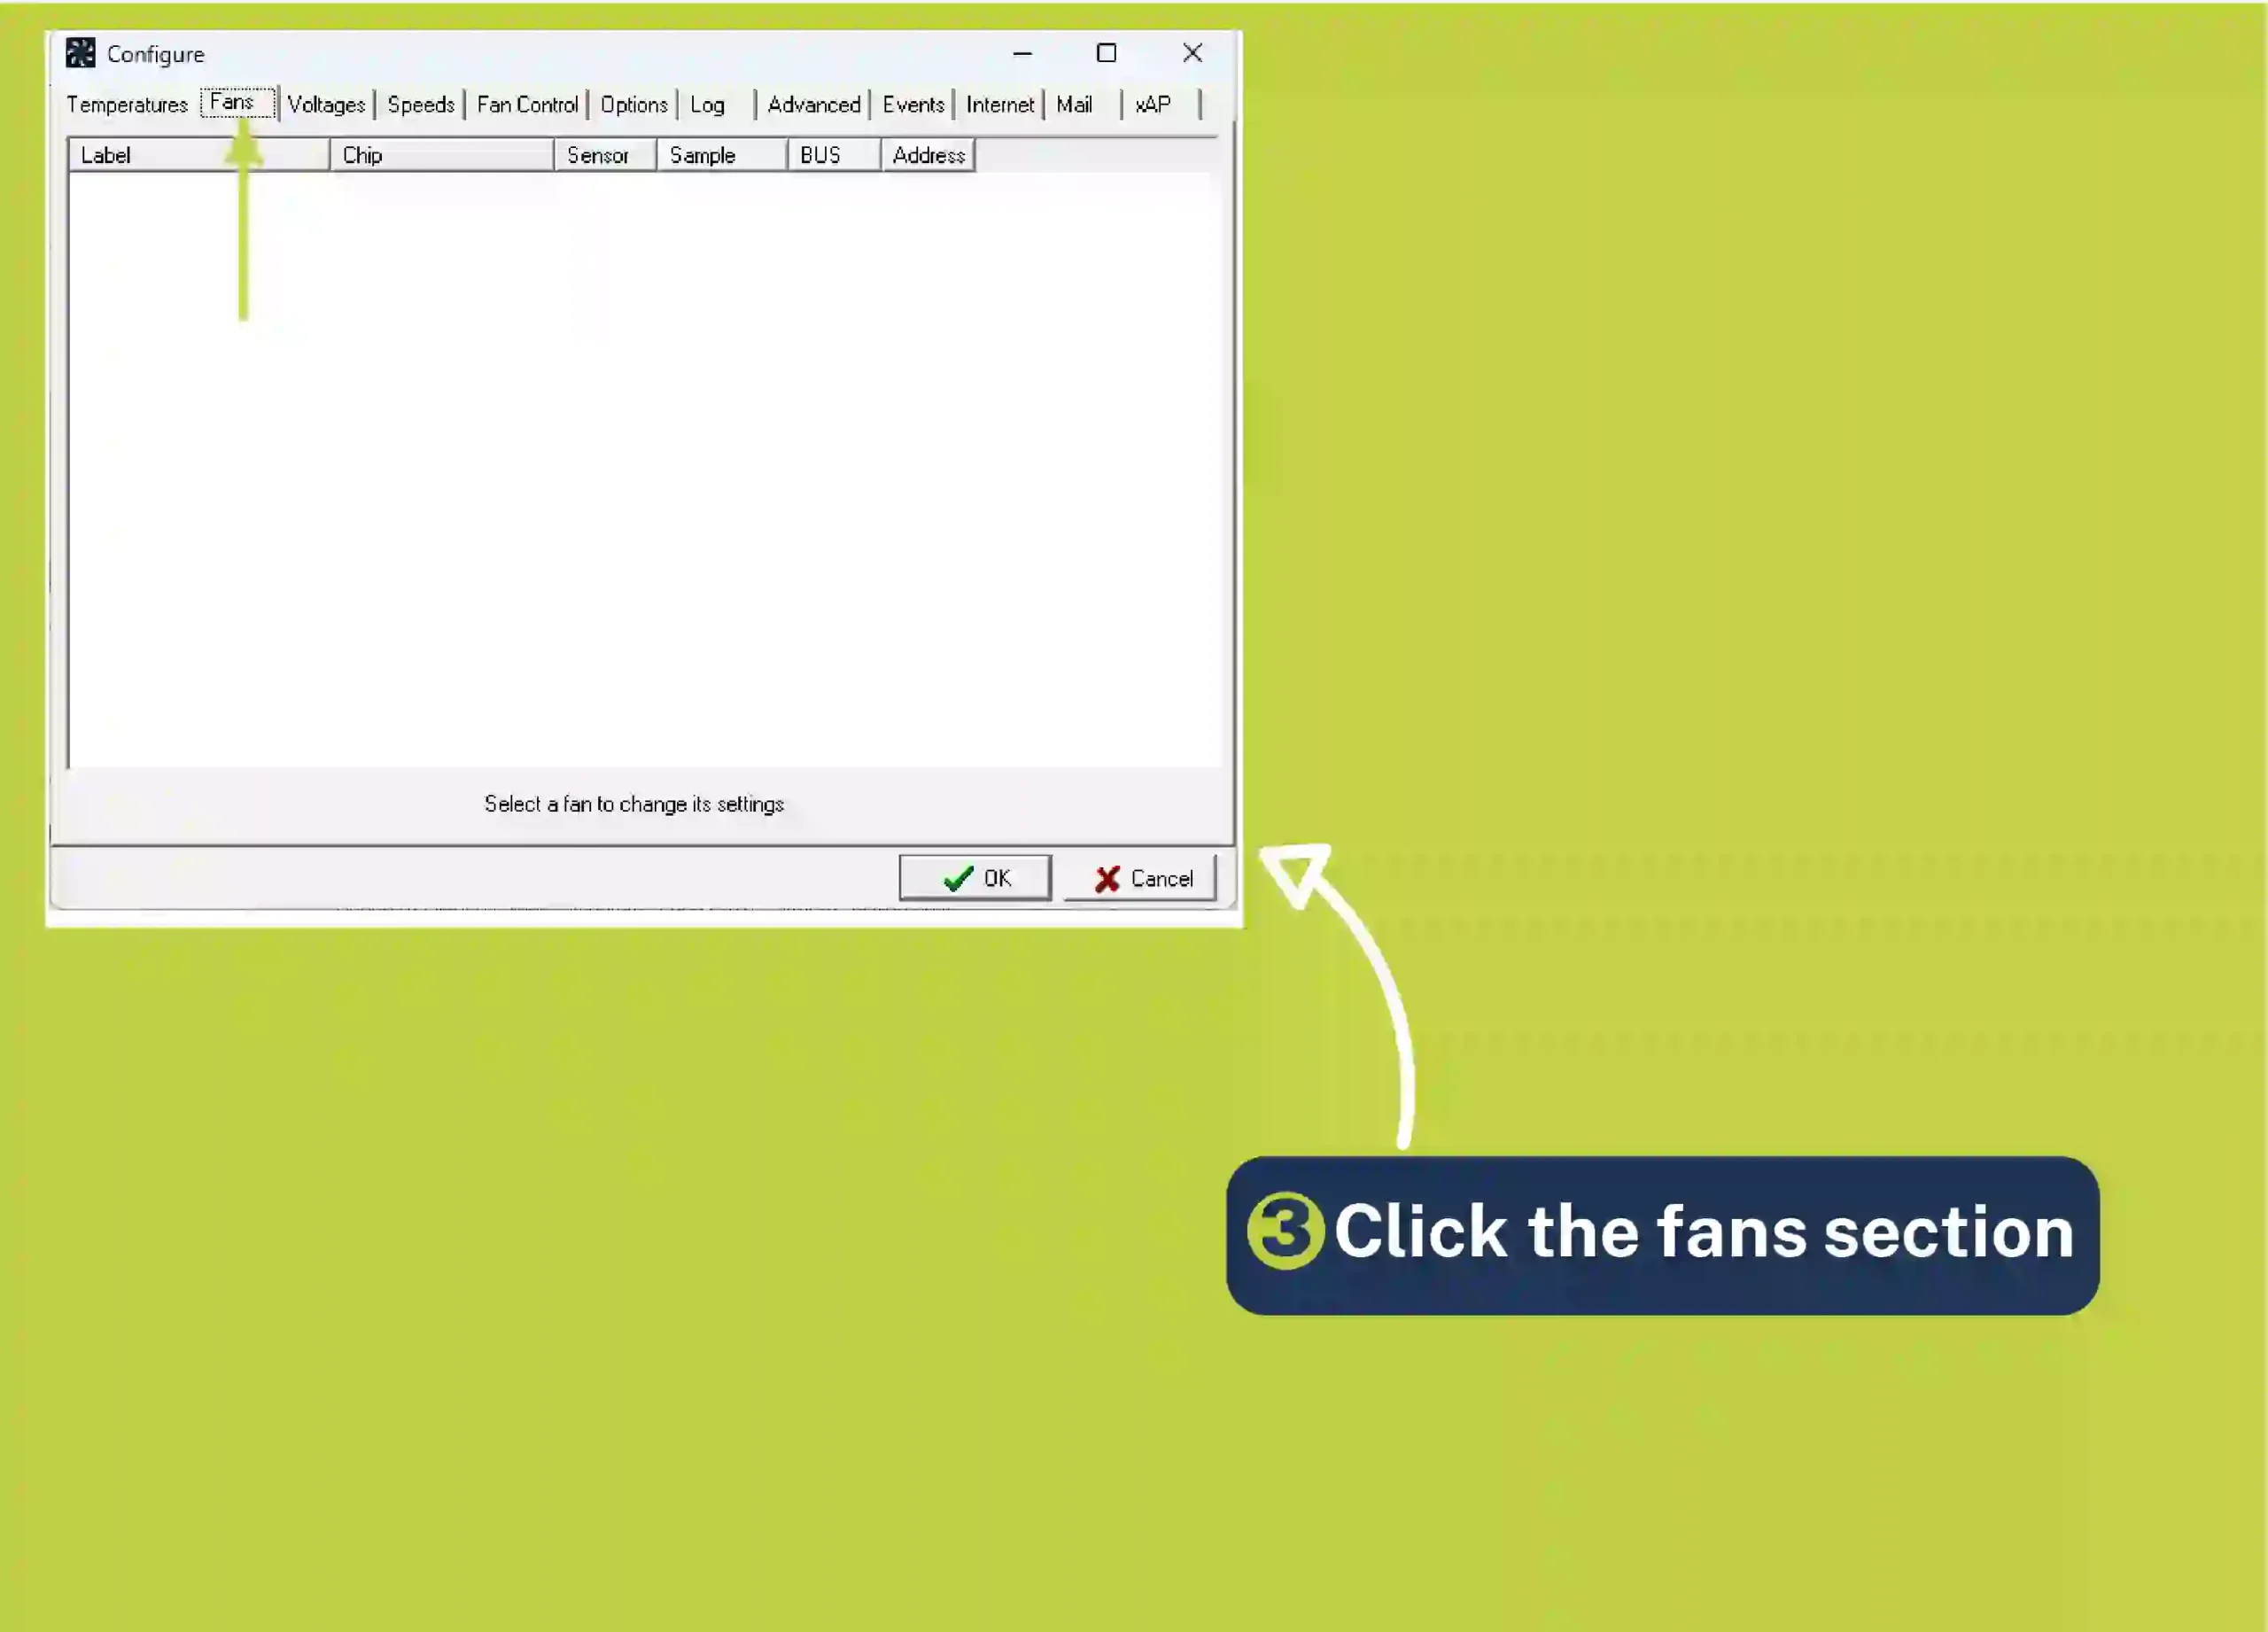
3.Click the fans section
4.Change the speed according to your PC performance
Warning
Do not change your fan speed to zero, It will slow down your computer.
If you have checked that there is no issue with your fan hardware or heatsink, there could be a BIOS settings issue.
Therefore, we explain the steps for the bios setting error
Step1: Boot your PC and press f1 to enter the bios setting
Step2: Go to fan control
Step3: Click on fan speed
Step4: Change it to ignore
Millions of gamers play games as professionals who play games for hours which affects the PC cooling system. There are so many games that take extra RAM and extra space, which leads to lag issues because of heat.
However, they have the best computer cooling fans but they still find issues with the CPU cooling fan.
Therefore, we will explain the best ways for cooling PC Gaming.
FAQs
How to check CPU temp windows 10?
Monitoring your CPU temperature is a good thing because it saves you from further damage to your system. To check your windows 10 cpu temp boot your PC, then click one of these keys to enter bios settings F12, ESC, F2, or DEL When it opens, you will see the temperature on the monitor.
How to clean laptop CPU fan?
Why are my CPU fans so loud?


